4 Tips on ways to edit an MP3 using iMovie

You’re probably asking yourself, why should I learn how to make my own edits when I can censor curse words, trigger loops, etc., on the fly while I perform a DJ set?
No matter what type of DJ you are, understanding how to make your own edits has it’s advantages. The most important being the creative freedom to do more while you perform your set live. Not having to engage the reverse effect on your mixer on a curse word while a song is playing makes it so you have one less thing to worry about while DJing. This in turn allows you to channel your awareness to other important aspects of your performance.
Additionally, learning how to edit is a great avenue to get you acclimated to the world of production, the natural “next step” in the journey of a DJ.
This article will impart 4 tips on how to edit your MP3s on iMovie. That’s right, you don’t need to pay for an editing program like Logic or Audacity to learn.
4 Tips on ways to edit an MP3 using iMovie
1. Cut and Pasting sections of songs
Changing the arrangement of a song in a way that best suits what you’re trying to accomplish during a set is a game changer for DJs. For example, if you want to shorten a song you can cut and paste sections to your liking.
a) Isolate the section of the MP3 you wish to cut.

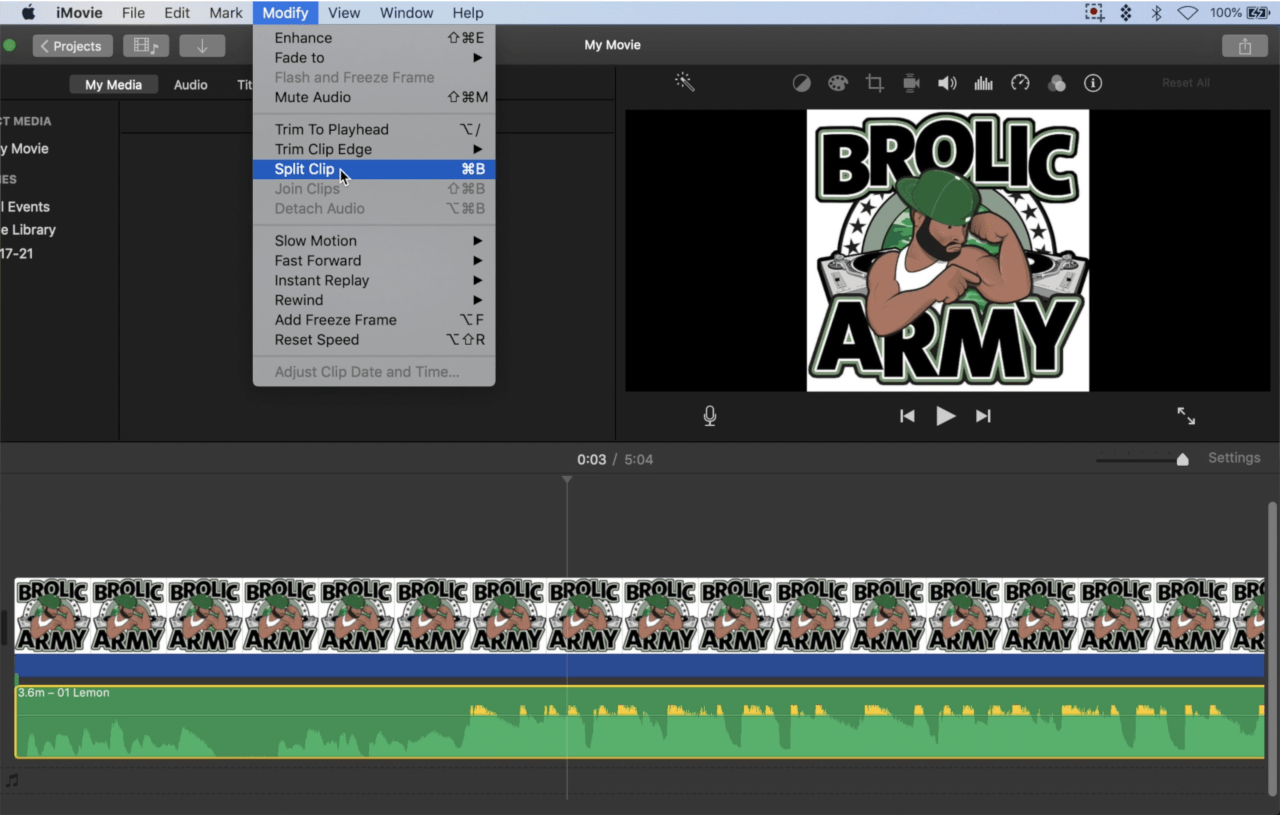
b) Go to your iMovie menu and click on MODIFY.
c) Scroll down to SPLIT CLIP.
d) Remove the audio data you isolated.
e) Paste the remaining sections together.
2. Deleting curse words
There are times where songs contain words your audience may find offensive. If you’re struggling to find “Radio Versions” or “Clean Edits” of the music in your set, there’s an easy solution.
a) Download an instrumental of the song you’re editing and import it into your iMovie session. If you don’t have access to an instrumental version, simply copy a 2-4 bar section of the song that features the music only from the WAV file. You can usually locate 2-4 bars of just a beat in the intro or outro of most songs.
b) Position your computer’s cursor to the beginning of the word you want to erase.
c) Crop out the section of the unwanted audio.
d) Fill that space with the portion of the instrumental. Using the same note the censored word appears in helps the edit sound more seamless.
3. Truncation
The process of copying a section of a song, be it drums, words or sounds isn’t always perfect. You might notice you’ve caught unwanted sounds. You can discard the excess sound from the desired section you want by following these easy steps.

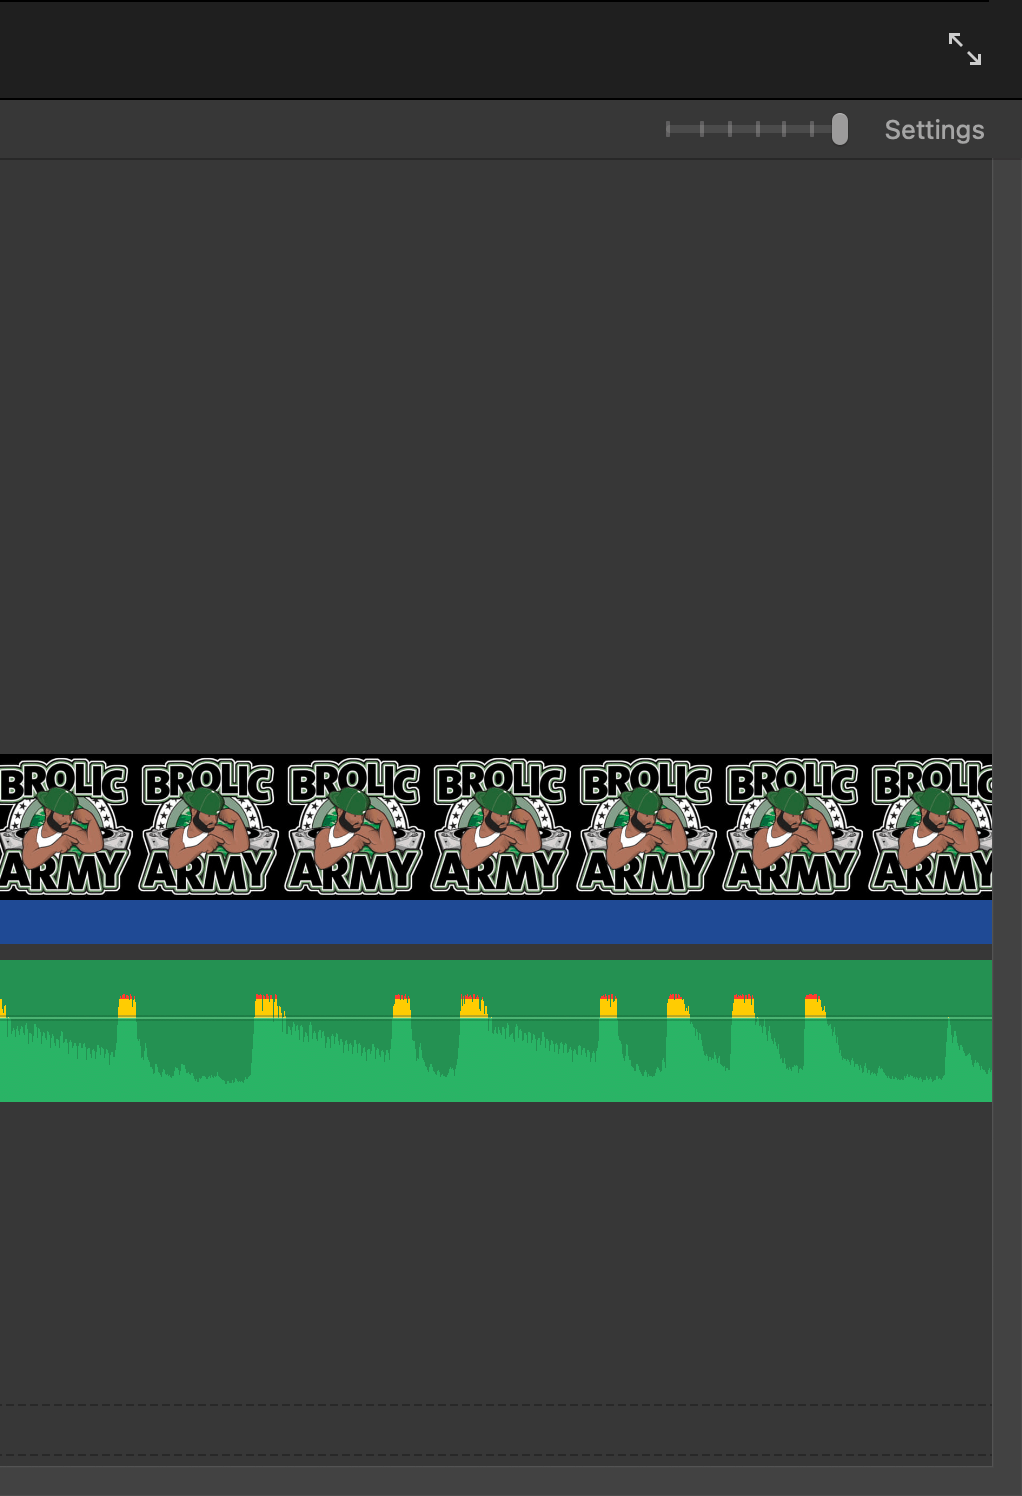
a) Magnify the wave file by moving your SETTINGS dial all the way to the right. This allows you to see the sound you want to discard easier.
b) Move your computer’s cursor to the area on the WAV timeline you want removed.
c) Click on it.
d) Go to your iMovie menu and click on MODIFY.
c) Scroll down to SPLIT CLIP.
d) Use your touchpad to drag the wave file closer to the point of the WAV file you do want. From there you can resume any copying or pasting.
4. Exporting
Adding the newly edited audio to your Serato crate is fast and easy.
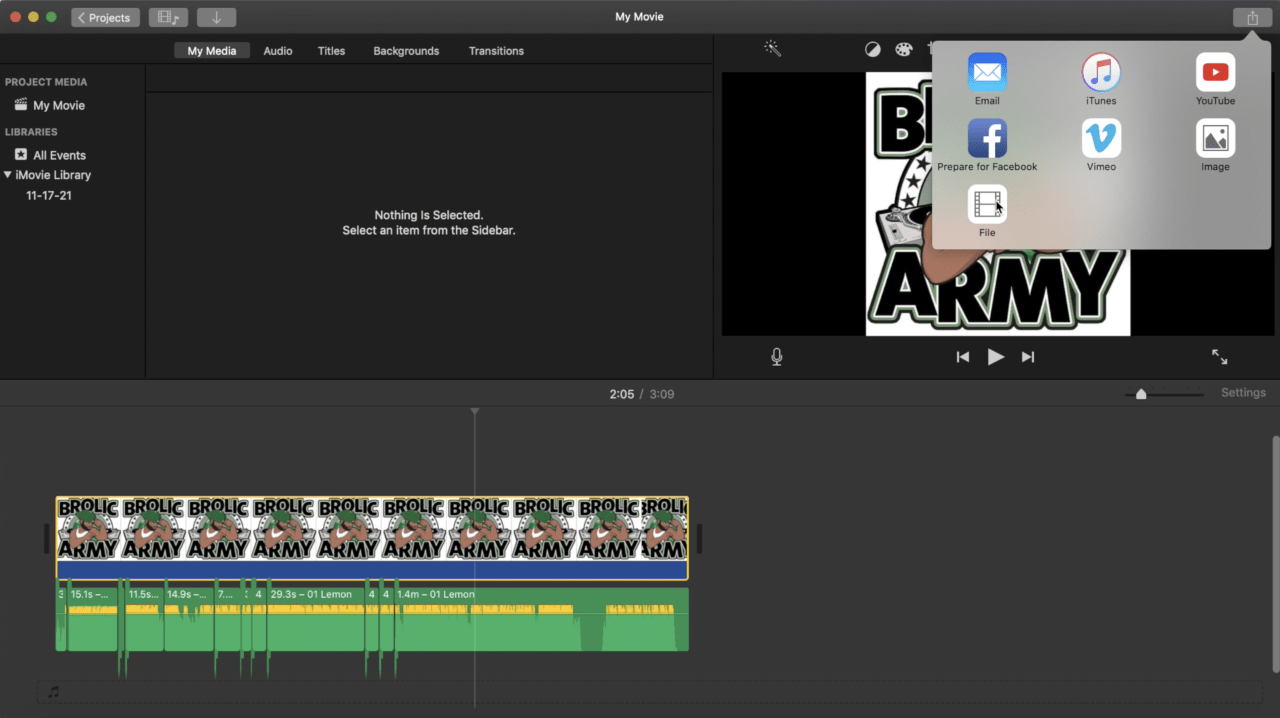
a) Click to open the File menu.
b) Choose SHARE.
c) Click on FILE.
d) Click on FORMAT.
c) Select AUDIO.
d) Check WAV.
e) Click the NEXT button.
f) Your computer will then save the file to wherever it’s designated to save files (desktop, documents, etc.).
As a DJ, be mindful of not disturbing the overall feel of the original track. The music you play out at the club, on the radio or during your live stream was produced in a particular way for a purpose so be respectful of that.
Making edits make for smoother DJ sets, so to learn more about this valuable tool enroll in our latest tutorial, Music Editing and Programming, in the Advanced DJing course at Brolic Army DJ School.


2 Comments on 4 Tips on ways to edit an MP3 using iMovie
Comments are closed.